Here is an outline of most of AnotherLevelUp's features. Those familiar
with Red Hat's AnotherLevel will recognize some of these. If you'd like to
just skim through the features new to, or significantly changed in,
AnotherLevelUp, then follow the trail of red dog kennels starting here.  What is this
icon?
What is this
icon?
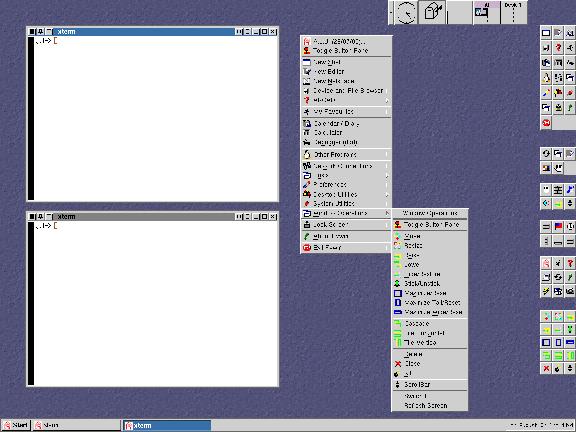
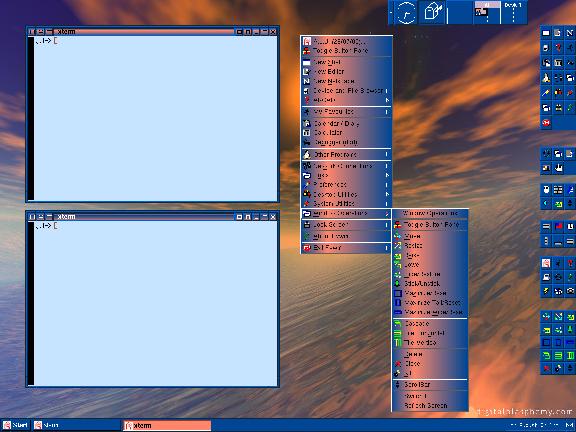
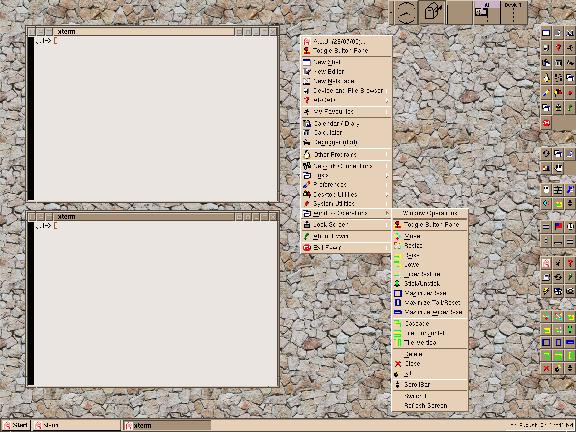
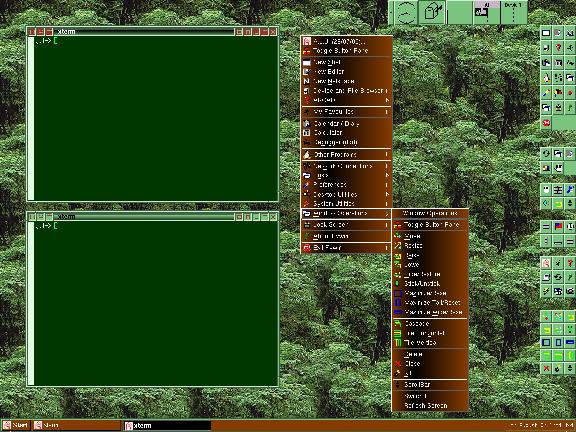
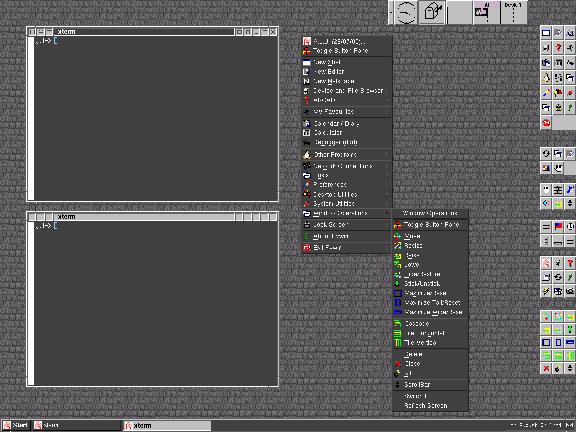
 Quick preview of sample GUI forms and menus
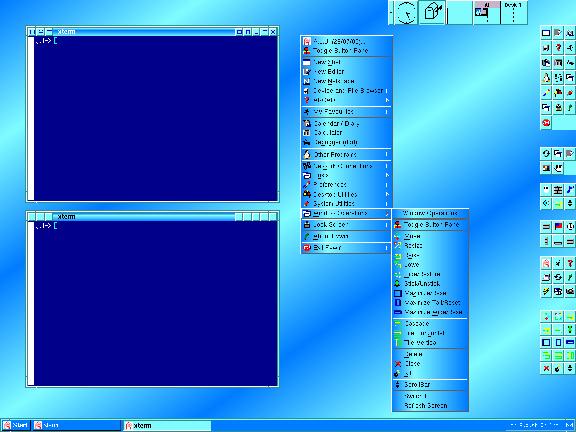
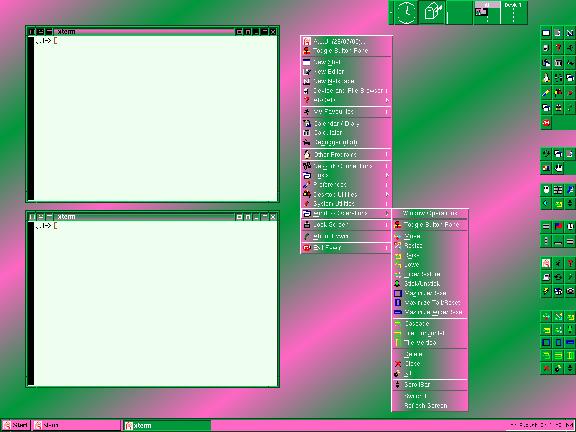
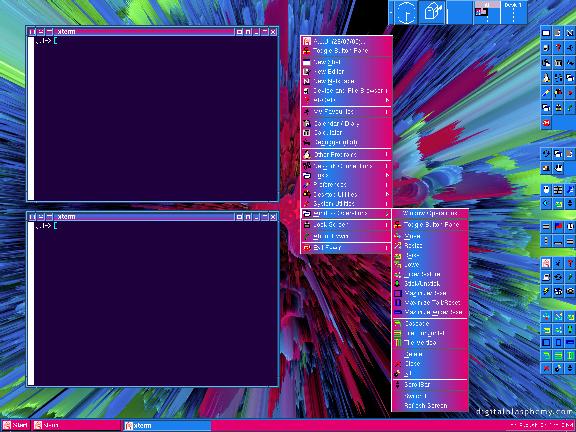
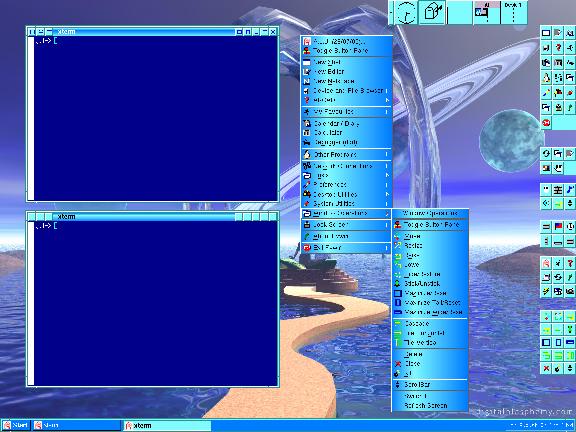
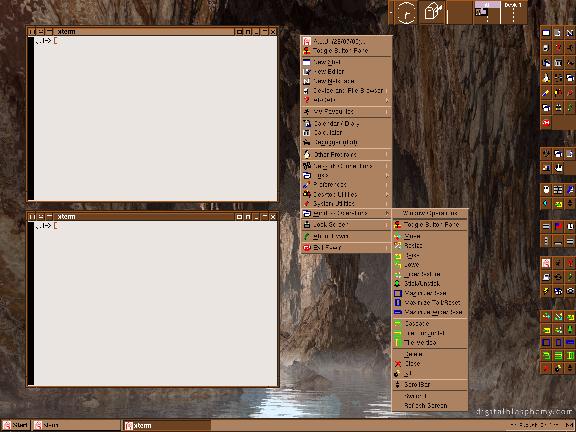
Some sample forms and menus can be previewed at the relevant points of discussion below. For convenience, they are collected together here. Note that the colours of the forms and menus depend upon user preferences or theme settings. These examples where made using the Night Driver theme.
 Fvwm95 or Mwm decor
Like AnotherLevel, AnotherLevelUp has two main decoration sets. The Mwm decor is a very basic configuration for those that want complete simplicity of presentation. The Fvwm95 decor is much more flexible and colourful, and, as the name suggests, looks a little like Windows 95, e.g. it uses the FvwmTaskBar. This similarity is reassuring for those who are new to a non-Microsoft environment, but really is rather superficial.
 Cache file
Like AnotherLevel, AnotherLevelUp generates the FVWM2 configuration file from M4 files on start up. This offers extremely powerful levels of flexibility, but adds a few seconds to the time need to start up (particularly now there are so many user selected features). AnotherLevelUp reduces this by caching the configuration file, and using the same result in the future if the settings have not been altered.
 User settings
The main features of AnotherLevelUp are governed by global files which are split into several areas of concern, as in AnotherLevel. When the user makes his or her own choices through the various forms and menu items, some user specific files are created and/or edited in a directory called $HOME/.fvwm2dir, and these files are read by the global ones at the appropriate points. The casual user need not be concerned with how this works, just be satisfied that their choice of settings are personal to them. More advanced users can place their own versions of some of the global files in this directory, or better still, just some additional lines for some of the global files, rather than copy the whole file.
 Saving preferences
Users can maintain more than one set of preferences to suit their mood, or experiment with new settings and easily return to their previous settings (if they are saved first). This is achieved by the user saving their current preferences under a named preferences set, and later loading back such saved preferences. Each set of preferences is saved by AnotherLevelUp, upon user request, in a separate directory (called $HOME/.fvwm2dir-<\PREF NAME>) -- again the casual user need not be concerned with how this works. As one would expect, such saved sets of preferences can also be deleted!
 Shared themes
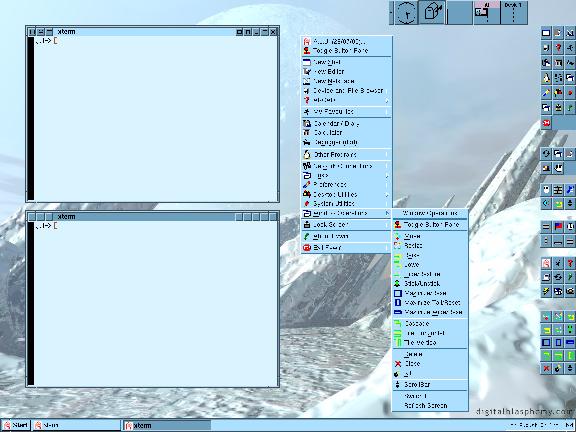
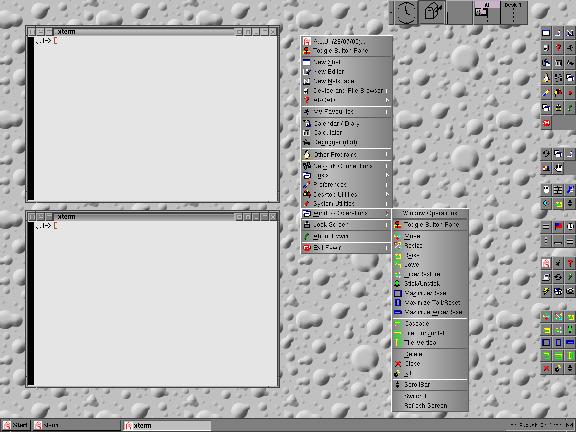
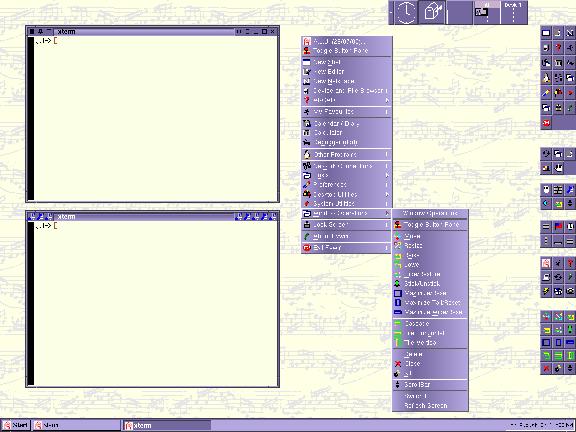
There are nearly 60 ready made shared themes which can be loaded from a menu. These are preference sets governing things like background image, colours and window decorations which are merged in with the users' choice of other settings. Such themes can be altered by the users and saved as their own personalized version. Users who have write permission to the global shared preferences area, can export their preference sets to become shared themes -- it is probably not advisable to give many users this privilege!
A preview of AnotherLevelUp's shared themes can be seen here.
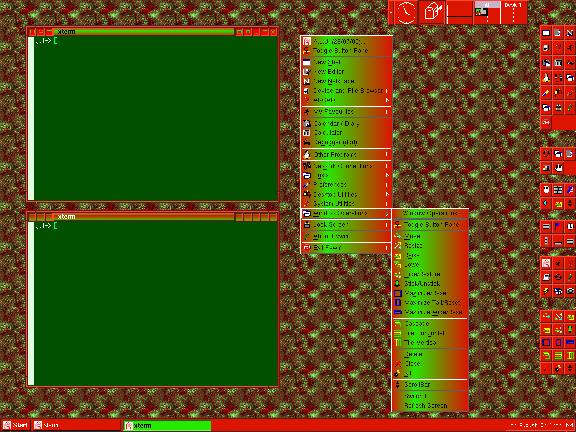 Random themes / preferences sets
Users who like to have much variety in the appearance of their desktop set up can switch on a random theme / preferences set mode. When this is on, AnotherLevelUp randomly chooses a theme or preferences set when it starts (or restarts). This random selection is made from a collection which the user has control over.
 Favourites menu
AnotherLevelUp maintains a favourites menu for each user. Whenever a program is started from the Other Programs menu (or from the menu invoked by a right-click on the root window), the event is stored in $HOME/.fvwm2dir/1-favourites-menu. Later, when the user chooses the Favourites option from the main menu, he or she is presented with a menu to reinvoke any of those favourites. This menu contains a page of the 10 most recently invoked programs, plus a page of the most frequent 10, the next most frequent 10, and so on. There is also a facility on this menu to add new items (so the user can have favourites which are not available on the Other Programs menu), delete items, and add new items based on existing ones.
In addition, the favourites menu offers a directory browser menu enabling the user to walk through the filestore directory tree and start an xterm at any point. This is then added so their current favourites, so is easy to find again next time.
Advanced users can also define their own fixed user menu which is appended to the favourites menu.
 Start menu
The start menu is invoked by clicking the left mouse button anywhere on the background, or by clicking the start button of the task bar in the Fvwm95 decor. From this menu, the following can be invoked:
New editor (see below)
New netscape
Device and File Browser. This offers a sub-menu including the following. Gnome
browser (gmc) if installed: this selection is persistent, if you start it from
this menu, it will be started automatically next time you log in; until you
stop it from this same menu item. Mount, unmount or browse Floppy, CD Rom, and
Zip (as appropriate).
Favourites menu (see above)
Calendar / diary (ical)
Calculator (xcal)
Debugger (ddd -- if installed)
Other programs -- an automatically created menu which should cover most of the
applications installed. This can recognise the standard Debian menus, or run
the wmconfig program, or run AnotherLevelUp's own Gnome menu building script,
as appropriate. Starting programs from this menu automatically hooks them in
to the user's favourites menu.
Network Connections (a menu enabling start or stop of all user controllable
network connections -- e.g. PPP connections).
 Preferences menu
This menu controls general user preferences settings.
Stored Preferences (loading, saving and deleting of user's preference sets and
shared themes, and selection of random themes mode. Note: loading preferences
cannot change the settings of existing running applications, such as xterm:
only ones started after loading will get the new settings.)
Initial Windows (full features only if screen size is greater than or equal to
1152x864 -- see below)
Editor Choice (choice of default editor between nedit, pico, jove, emacs,
xemacs, vim or none. The default is the first which is available in this
order: nedit, pico, jove, xemacs, emacs or vim)
Look (theme) settings (see below)
Feel settings (see below)
 Look (theme) settings menu
Screen Background (choice of static or moving background, plus xsnow and/or
xeyes and/or xearth -- see below)
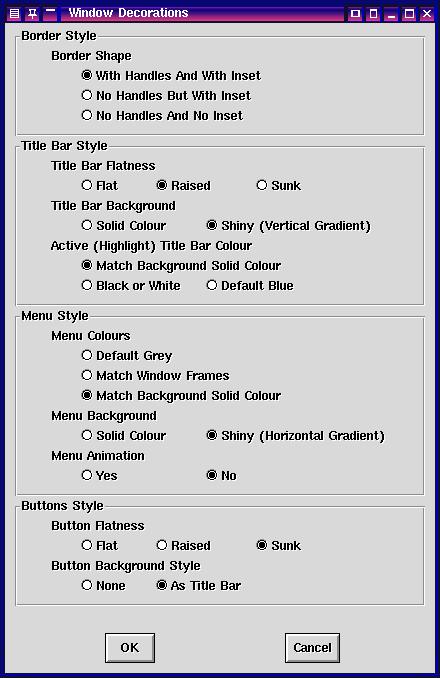
Window and Menu Decorations (choice of border style, title bar style, menu
style and buttons style -- see
below)
Window Buttons (choice of button icons for active, active pressed and
inactive windows, plus choice of any of 8 window buttons -- see below)
XTerm Preferences (choice of settings for the most common xterm
preferences: colours, geometry, wrap, scroll bar and font -- see below)
Look (theme) settings menu
Screen Background (choice of static or moving background, plus xsnow and/or
xeyes and/or xearth -- see below)
Window and Menu Decorations (choice of border style, title bar style, menu
style and buttons style -- see
below)
Window Buttons (choice of button icons for active, active pressed and
inactive windows, plus choice of any of 8 window buttons -- see below)
XTerm Preferences (choice of settings for the most common xterm
preferences: colours, geometry, wrap, scroll bar and font -- see below)
 Feel settings menu
Key repeat speed (persistently select from 9 speeds, default or none).
Bell pitch (persistently select from 4 octaves of notes, default, or none)
Window keyboard focus (persistently select Click To Focus, Sloppy or Mouse
Focus)
Feel settings menu
Key repeat speed (persistently select from 9 speeds, default or none).
Bell pitch (persistently select from 4 octaves of notes, default, or none)
Window keyboard focus (persistently select Click To Focus, Sloppy or Mouse
Focus)
 Desktop Utilities menu
Pager Settings (persistently select number of desktops, and horizontal and
vertical number of pages per desktop, and whether pager stays on top; and
whether pager is on or off)
Xbiff Preferences (persistently choose mail warning program between xbiff,
xmailbox and xlbiff; and whether it is enabled or disabled)
Xclock Preferences (choice of X Clock program between xclock (analogue),
xclock (digital), xdaliclock, astime and rclock; and whether clock is shown)
Wharf (persistently toggle on and off the FvwmWharf module)
Desktop Utilities menu
Pager Settings (persistently select number of desktops, and horizontal and
vertical number of pages per desktop, and whether pager stays on top; and
whether pager is on or off)
Xbiff Preferences (persistently choose mail warning program between xbiff,
xmailbox and xlbiff; and whether it is enabled or disabled)
Xclock Preferences (choice of X Clock program between xclock (analogue),
xclock (digital), xdaliclock, astime and rclock; and whether clock is shown)
Wharf (persistently toggle on and off the FvwmWharf module)
 System Utilities menu
The system utilities menu offers the following choices:
Console (persistently toggle on and off the display of a console terminal
in the top left hand corner of the screen)
Monitor error file (persistently toggle on and off a widget that will pop up
whenever any output is written to $HOME/.ALU-errors-*-*: the
widget shows the contents of this file. Requires perl-tk to be installed.)
Capture Full screen to file (xwd image stored in file
full-screen)
 Window Operations menu
This menu offers window operations that can be selected and then applied to a window.
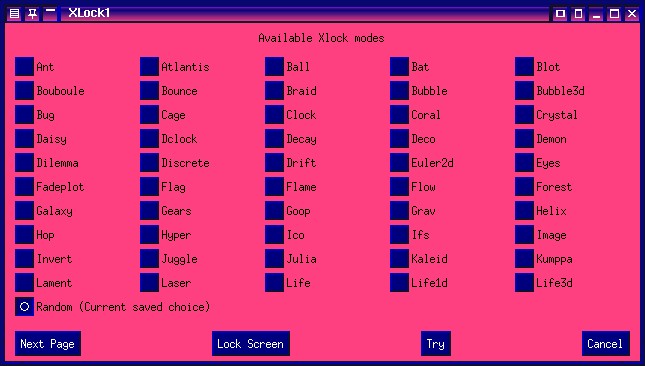
 Lock screen
The lock screen menu option allows the user to choose from any of the xlock modes available, try them out and select one to use as the lock screen. The choice is remembered and becomes the default after the next restart or login. (Previously in Red Hat's AnotherLevel the similar facility was broken because xlock was offering too many modes. That problem is solved in AnotherLevelUp by automatically dividing the choices into pages of up to 50 modes per page.) You can preview the form here.
 Exit menu
This menu enables the users to log out, among other things. Switching between window managers should work on Red Hat 6.0 or greater, and may not work in other set ups.
Restart Programs (starts up the same initial windows as on login -- see below)
Shutdown and halt (if /usr/bin/shutdown available)
Shutdown and reboot (if /usr/bin/shutdown available)
 Initial windows
On start up, AnotherLevelUp can start a number of specific applications for you, and place them sensibly on the screen. This facility requires the screen size to be at least 1152x864 for the full features. There are just 5 applications that can be started in this way:
For screen sizes less than 1152x864, the user can only control whether netscape starts or not.
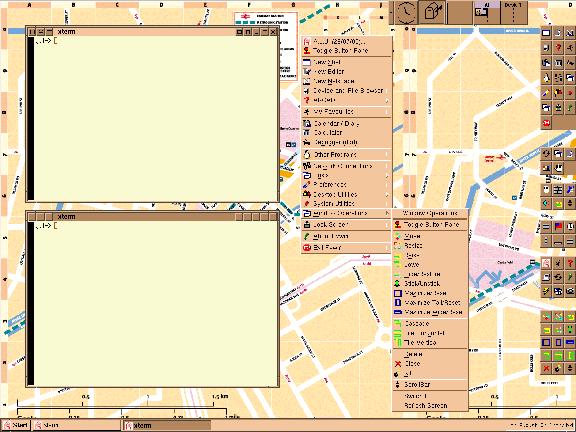
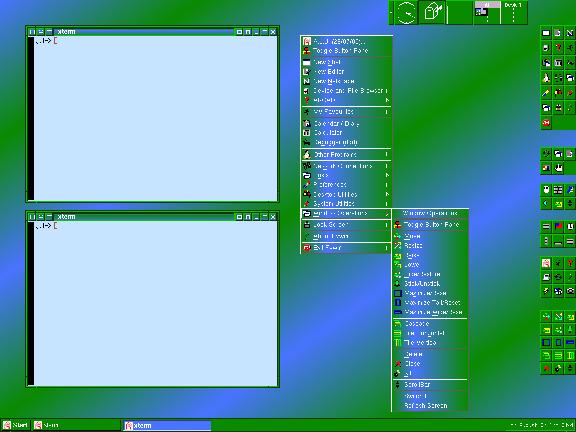
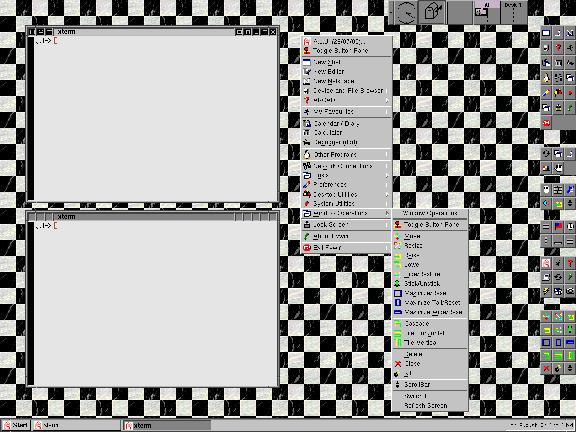
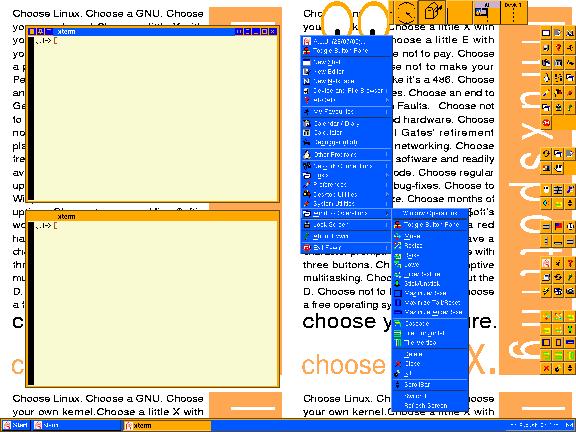
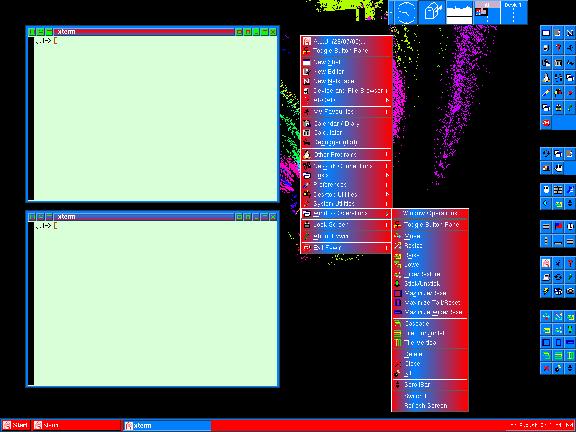
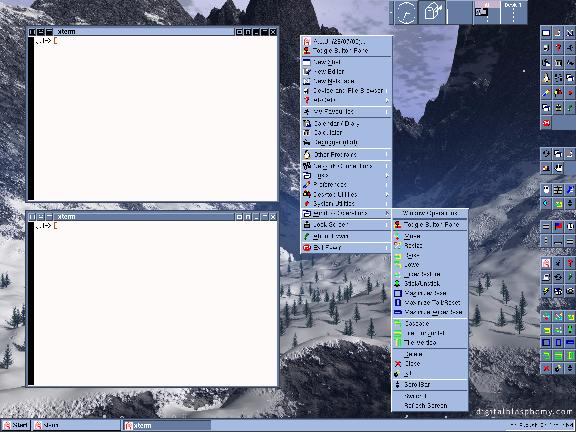 Screen background and window frame colour
This look (theme) settings sub-menu allows the user to choose a static background or a moving one. Additionally, the user may add xsnow and/or xeyes and/or xearth. The window frame colour is also chosen here to match the background colour.
For a static background, the user can choose between a single solid colour, or a diagonal stripe mixture of the background colour and the window frame colour, or an image file. The solid background colour is chosen via 3 sliders, one each for red, green and blue. The window frame colour is also chosen here, and it can either be grey or one of 8 colours automatically selected to relate to the chosen solid background colour. This frame colour is used whether or not the chosen solid colour is used (e.g. even if the background is chosen to be a moving one).
AnotherLevelUp automatically chooses title bar (and menu) foreground text to be either black or white depending on the brightness of the text's background colour.
The moving background is chosen from the set of available xlock modes, using a form similar to the lock screen menu item.
 Window and menu decorations
This look (theme) settings form allows the user to choose various styles for the way windows and menus look (and behave). You can preview the form here.
The window border style can be one of
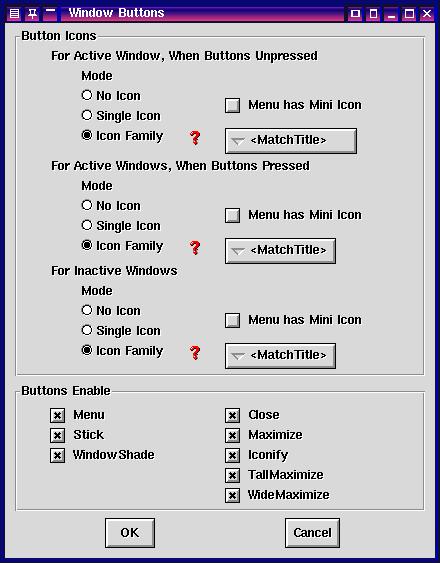
 Window buttons preferences
The window buttons preferences form allows the user to choose the button icons style for each of the three windows states: active unpressed, active pressed and inactive. The form also permits the user to choose which of 8 buttons should appear on the window titles. You can preview the form here. For each of the three window button states the choices are:
The default setting enables all 8 of these buttons.
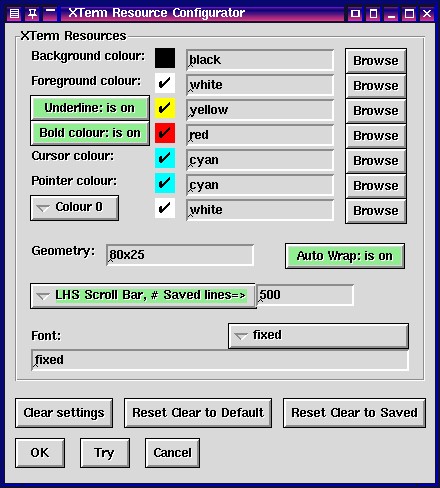
 XTerm preferences (X resource editing)
The XTerm Preferences form allows the user to set values for the most commonly used XTerm X resources.
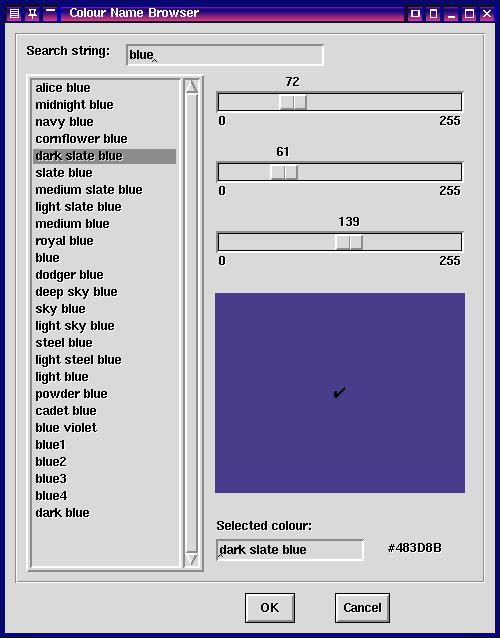
Colours are set via a colour browser, offering all the named colours in the RGB database and 3 sliders, enabling colours to be referenced by name or hex value. You can preview the main form here. The settable colours are:
The underline colour and bold colour can each be switched off too. The other settings are:
A Try button enables the user to test the settings before saving them: this creates an xterm running a simple script which puts the new settings to the test.
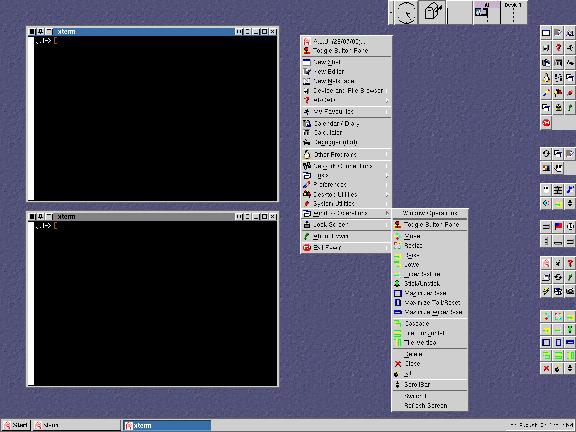
 Menu button panels
A very handy feature of AnotherLevelUp is its ability to place any of the most often used menus permanently on the right side of the screen, as compact panels of mini buttons. AnotherLevel had a similar feature for 3 of these menus, but the idea has been seriously enhanced.
The menus are the Main (Start) Menu, Preferences Menu, Feel Settings Menu, Desktop Utilities Menu, System Utilities Menu and Window Operations Menu. The feature is enabled by default for all of these menus. It can be persistently toggled on and off via a menu item at the top of each of the menus.
The buttons for each menu are displayed as a panel 3 items wide (or wider on screens smaller than 1152x768), on the right of the screen. Each button has an icon which reminds the user what the button means. However, in case there is doubt, when the user presses a button, a menu pops up, describing the button and (usually) offering just one choice which is to invoke that option. So it is not easy to accidentally select the wrong button. You can preview the buttons for the main menu here.
Using this feature disables the FvwmWharf as it uses the same area of screen. However, this feature should be considered as a much more space-efficient alternative to wharf, so it is unlikely any user would want to have both at the same time.
 Window title bar mouse actions
Most windows have a title bar. In addition to the buttons which the user can select to appear on title bars, there are 3 functions which can be invoked using each of the 3 mouse buttons in the title area.
Additionally, a window may be resized by pressing and holding the left mouse button while on the very edge of its frame.
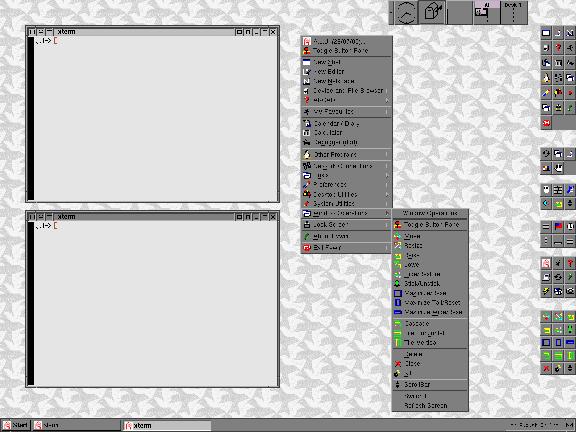
 How to make a theme
Making themes in AnotherLevelUp is easy, and can take as little time as 20 minutes from scratch.
Before you start, you should save your current preferences if you want to. If you have already named them (by saving them in the past) you can use the menu item Preferences->Stored Preferences/Themes->Resave as <\NAME>. Otherwise you can save them using Preferences->Stored Preferences/Themes->Save as... and choose a name in the form that pops up.
AnotherLevelUp themes are all based on four colours:
Additionally, you may choose an image or an xlock mode as a moving background. You may also add xeyes and/or xsnow and/or xearth as final icing on the cake.
The principle is this: you choose the solid background colour (even if you are going to use an image) as any colour at all. Then you choose the frame colour from one of grey or 8 colours which are related to the solid background colour. AnotherLevelUp then automatically chooses black and/or white as appropriate in various places.
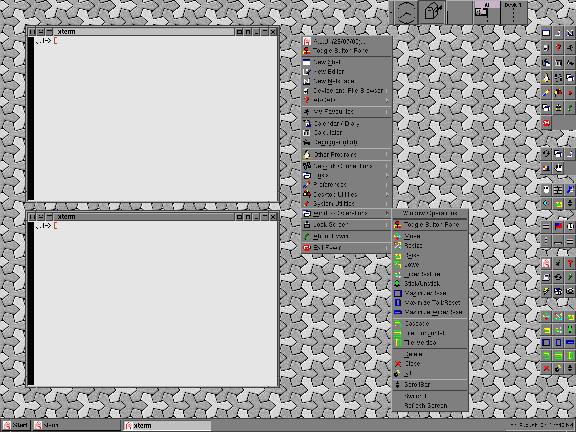
Before you make a theme, you decide on the background. The choices are:
For illustration, let's assume you want to use an image file. Select the preferences->Look (theme) settings->Screen Background->Static menu option, and the Static Background Settings form pops up. Click on the browser option, and choose an image using the browser that pops up. Use the Try image on background button to temporarily load the image into the root window (desktop background). Click on the Okay button to leave the browser and return to the previous form.
Now use the 3 colour sliders to choose a solid background colour which `matches' the image -- even though your background will be the image, this chosen solid colour will play a very important part in your theme.
Next you choose a colour for your window frames, the frame colour. You can have grey frames, or one of 8 colours which are `related' to the solid background colour. These 8 colours are generated by negating any of the red, green or blue components of the solid background colour, or leaving them as a lighter or darker shade (depending on brightness) of the same colour. The Auto Frame? button toggles between grey or coloured window frames. When Auto Frame? is selected, you can then negate any or all of the Red, Green or Blue components directly, or step though each of the 8 combinations in turn. The icon picture shows you the colour of your window frames.
You may wish to adjust your solid background colour slightly so that both it and the chosen window frame colour `match' your background image.
Press Okay to save these choices.
Your theme is well under way already: all the forms, buttons and even the calculator should `nicely' match. AnotherLevelUp automatically chooses black or white text for your forms (such as lock screen), title bars and menus, depending on the brightness of the corresponding background behind the text.
Next you should run the Preferences->Look (theme) settings->Window and Menu Decorations form to choose some of the decor details. A little experimentation may be needed to appreciate what each option can give you -- see above.
After this, you should run the Preferences->Look (theme) settings->Window Buttons form to select more of the decor details. Again some experimentation may help -- see above.
Finally, you should run the Preferences->Look (theme) settings->XTerm Preferences form to choose the colours (etc.) of your xterms (and nedit, and emacs) -- see above. You should do this carefully -- avoid background colours which are of a medium brightness: choose a very dark or very light colour to get enough contrast with the range of foreground colours you also have to choose. Make sure you use the Try button to ensure your choices are sensible. In particular, if you use nedit as your editor and you are likely to use its language modes, make sure that xterm colours 0 to 7 are clearly visible on your chosen xterm background. This is because your nedit preferences are (currently) automatically derived from your xterm preferences.
If you are happy with your preferences, it may be a good idea to save them using the Preferences->Stored Preferences->Save as... menu item. This would mean you can play with your settings in the future and be sure you can restore them to what they are now. Be careful not to accidentally select the Preferences->Stored Preferences->Resave as <\NAME> option, unless you really want to save the new settings over the old settings for the current theme, if you have one.
 +
+
 =
=
